Table of Contents
Introduction
In this guide, I will be showing you how to create a free bulk email sender function using Google Sheets and Google Apps Script. This post will cover how to send bulk emails via Gmail with customized data (such as their name) for each recipient.
There are many apps that offer this service for a cost, but if your goal is to send mass emails with simple personalized data for each recipient, you can achieve this for free within a few minutes by setting up a Google Sheet and a Google Apps Script!
Let’s dive in!
Set Up The Spreadsheet
1. Create a Mass Email Template
First, you will need to create a Google Sheet to store the template of your bulk email. For this example, I have stored my email subject in Cell B2 and my email body in Cell B3 in a sheet called ‘Template’.
2. Define your Customized Data
Next, define the customized data to be replaced for each recipient. In this example, I will be adding each recipient’s website and name in the email, so I have added the placeholders <name> and <siteUrl> where necessary. Of course, you can use any placeholders that meet your needs.

3. Create the Data Sheet
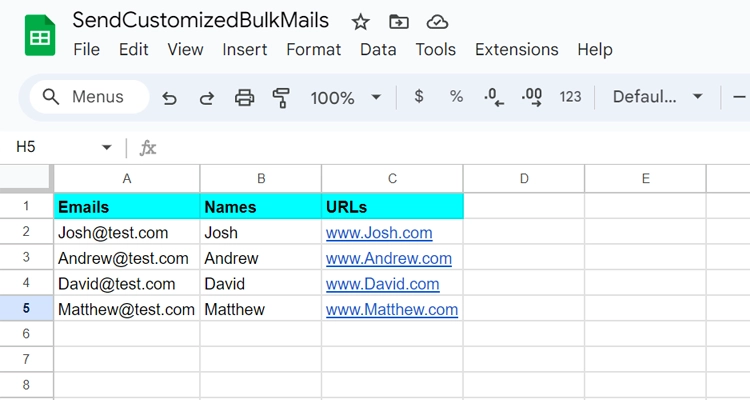
Add a new sheet named ‘Data’ to store all the recipients’ email addresses and customized data. First, add the email addresses of your recipients in one column, then add columns for each type of custom data you plan to include in your emails. Here’s the data I will be using for this tutorial:
– Col A: Recipients’ Emails
– Col B: Names
– Col C: Site URLs
*Note that you can add as many email addresses, names, and other customized data as you like.
Set Up The Google Apps Script
In your Google Sheet, go to Extensions > Apps Script.
1. Create an onOpen function
This function adds a custom menu to your spreadsheet, allowing you to run a ‘sendPersonalizedEmails’ function, which we will create below.
This function is optional but allows the sender to send mass emails directly from the Spreadsheet without having to access Google Apps Script.
function onOpen() {
	var ui = SpreadsheetApp.getUi();
	ui.createMenu("Email Sender) .addItem("send Emails, "sendPersonalizedEmails").addToUi();
}
2. Create the ‘sendPersonalizedEmails’ function
This function retrieves the email template from the “Template” sheet and the customized data for each recipient from the “Data” sheet. It replaces placeholders <name> and <siteUrl> in the template with the actual data for each recipient and sends the bulk email using Gmail.
function sendPersonalizedEmails() {
	var ss = SpreadsheetApp.getActiveSpreadsheet();

	// Get the email template
	var templateSheet = ss.getSheetByName("Template");
	var subjectTemplate = templateSheet.getRange("B2").getValue();
	var bodyTemplate = templateSheet.getRange("B3").getValue();

	// Get the customized data
	var dataSheet = ss.getSheetByName("Data");
	var dataRange = dataSheet.getRange(2, 1, dataSheet.getLastRow() - 1, 3).getValues();

	// Iterate over the data
	for (var i = 0; i < dataRange.length; i++) {
		var email = dataRange[i][0];
		var name = dataRange[i][1];
		var siteUrl = dataRange[i][2];

		// Replace placeholders with actual data
		var subject = subjectTemplate.replace("<siteUrl>", siteUrl);
		var body = bodyTemplate.replace("<name>", name).replace("<siteUrl>", siteUrl);

		// Send the email
		MailApp.sendEmail(email, subject, body);
	}
}
Save your Script and reload your spreadsheet.
Run the Script
Run the ‘sendPersonalizedEmails’ Function
You can send out your bulk email by selecting ‘Send Emails’ from the ‘Email Sender’ menu in your Google Sheet. Once the emails are sent, check the ‘Sent’ folder in your Gmail to confirm that they have been dispatched correctly.

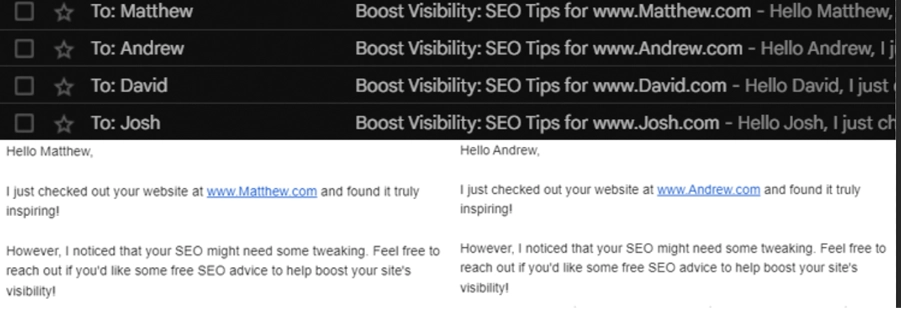
Mass Email Sent!
As you can see in the screenshot below, my emails were sent at once to all recipients with their respective customized data.
Conclusion
There you go! You can now send mass emails in Gmail with individual names and other customized data for each recipient!
0 Comments